Dial In Heart Waffles: Texture & Color Settings Guide
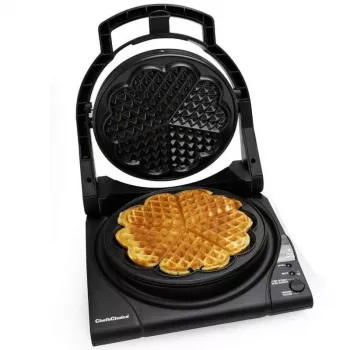
Heart-shaped waffles, exactly the way they like them
A heart-shaped waffle maker already turns a simple breakfast into a moment. Add texture and color settings, and it becomes a dependable way to match everyone’s preference—soft and light for kids, crisp and golden for brunch, deeper brown for that caramelized edge. Our team put together the practical “what changes what” so you can stop guessing, get consistent heart shapes, and keep your nonstick plates performing well for the long run.
What texture & color settings change (and why it matters)
Even with the same batter, waffles can land anywhere from cake-soft to shatter-crisp. That’s because two things are happening at once: moisture is evaporating, and sugars/proteins are browning. Texture and color settings let you guide those outcomes more intentionally.
- Texture control is about moisture and crispness: lower texture settings tend to keep waffles softer inside and out; higher settings drive off more moisture for a crisper bite.
- Color control is about browning: lighter settings reduce browning; darker settings promote a deeper golden-to-brown finish and more toasted flavor.
- Settings help standardize results even when batter varies: different flours, mix-ins, or refrigerated batters can cook differently from day to day.
- Customization reduces “guess-and-check” cooking: fewer split waffles, fewer overdone edges, and less wasted batter.
| Preference | Texture setting direction | Color setting direction | Best for | Tips for consistency |
|---|---|---|---|---|
| Soft & light | Lower | Light to medium | Kids, quick weekday breakfasts | Use slightly thicker batter; avoid overfilling |
| Balanced (tender inside, lightly crisp edges) | Medium | Medium | Most classic waffles | Preheat fully; rest batter 5–10 minutes before cooking |
| Crisp exterior | Higher | Medium to dark | Brunch plates, toppings like fruit and syrup | Reduce sugar slightly if browning too fast; keep lid closed until done signal |
| Deep golden & toasty | Medium to higher | Darker | Dessert waffles, chocolate drizzle, ice cream | Watch sugary batters; let waffles cool 1–2 minutes to set |
Getting consistently shaped, evenly cooked heart waffles
Heart shapes look simple, but they’re less forgiving than a plain grid—especially around curves and edges. These habits help you get crisp definition without thin, overbrowned rims.
- Preheat fully before the first pour: early pours often cook unevenly and can stick more.
- Portion with intention: add enough batter to fill the heart pattern without flooding the edges; overfilling can seal the lid and push batter into thin “skirts” that overbrown.
- Close the lid gently and don’t peek: opening mid-cook dumps steam (your natural “oven heat”) and can tear the waffle surface.
- Keep finished waffles on a wire rack: stacking traps steam and softens the exterior—especially if you like higher texture (crisper) results.
- If you’re adding mix-ins: fold chips/berries in after the batter rests so it thickens and suspends add-ins more evenly.
A simple “dial-in” routine our team uses
Start at medium texture and medium color for your first waffle. If it’s browned enough but not crisp, raise texture one step. If it’s crisp enough but too pale, raise color one step. Changing one dial at a time makes your next batch predictably better.
Make it yours: batters that pair well with adjustable settings
Different batters behave differently—mostly due to sugar, protein, and water content. Use the settings to compensate instead of changing your recipe every time.
Simple care that protects the nonstick surface and the finish
For additional safety context around nonstick surfaces, the U.S. Food & Drug Administration provides a helpful overview here: https://www.fda.gov/food/chemicals/metals-and-your-food.
When it’s not just breakfast: gifting and hosting ideas
If you’re holding food for a crowd, remember basic time-and-temperature rules. The USDA’s leftovers and food safety guidance is a solid reference: https://www.fsis.usda.gov/food-safety/safe-food-handling-and-preparation/food-safety-basics/leftovers-and-food-safety.
Our picks to make heart-waffle mornings easier
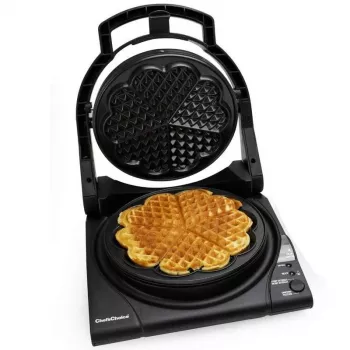
- 5 Heart-Shaped Waffle Maker with Texture & Color Settings — the dial-in control that lets you keep one person’s waffles soft while another’s come out crisp and deeply golden.
- Maximize Function, Minimize Clutter | Multifunctional Room Layouts eBook — helpful when you want a breakfast station that doesn’t permanently take over the counter.
- One Room, Real Progress: A Simple Step-by-Step Guide for Stress-Free Home Organization — a simple way to set up a realistic kitchen reset, so hosting feels lighter.
FAQ
How do texture and color settings work together for the best waffle?
Texture mainly controls how much moisture is driven off (softer vs. crispier), while color targets browning and toastiness. Start at medium/medium, then adjust one setting at a time based on whether you want more crispness (texture) or deeper browning (color).
Why do my waffles look dark but still feel soft inside?
Sugar-heavy batters and thin batters can brown quickly on the outside before enough moisture evaporates from the center. Lower the color setting, increase texture slightly, and make sure you fully preheat; letting the waffle rest 1–2 minutes also helps it set.
What’s the best way to keep heart-shaped waffles crisp for serving a group?
Cool finished waffles on a wire rack (not stacked), then hold them in a low oven while you cook the next batches. A higher texture setting generally helps crispness last longer, especially once toppings hit the plate.



Leave a comment