Build a Tiny Magic Study: 3D Wooden Puzzle Mini Kit
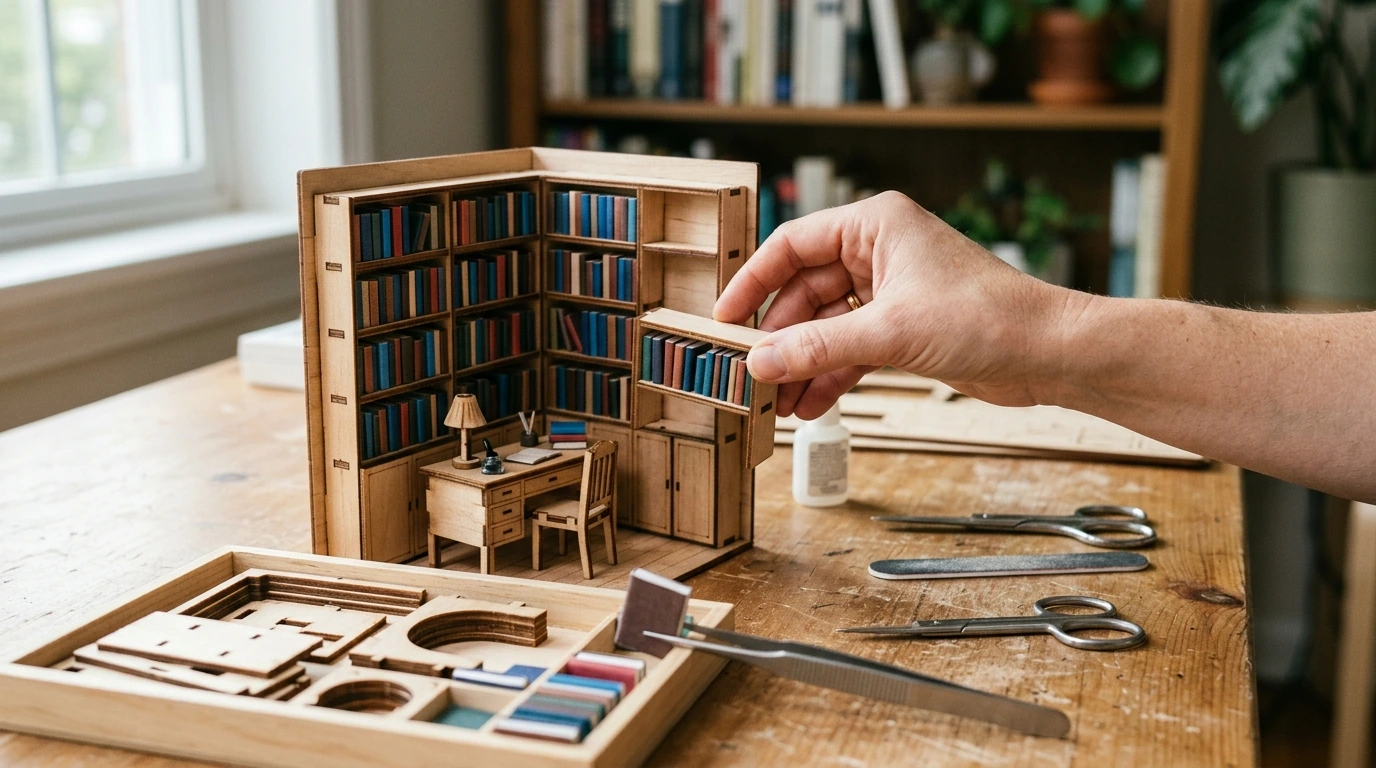
DIY Magic Study Miniature House Kit: a spellbinding desk-top library scene you build yourself
Some projects are pure relaxation; others feel like stepping into a story. Our DIY Magic Study Miniature House Kit with 3D Wooden Puzzle and Magical Books is made for slow, satisfying crafting—layer by layer—until a tiny study takes shape with shelves, books, and that cozy “late-night research” atmosphere. Set aside a calm afternoon (or a few evenings), put on a playlist, and enjoy the kind of hands-on build that looks impressive on a shelf and feels even better to finish.
What makes this miniature kit special
- A build experience that blends miniature-making with the satisfying “click” of a 3D wooden puzzle—great if you like structure, not guesswork.
- A magical study theme that leans into books, curiosity, and old-library vibes—ideal for gifting to fantasy readers, tabletop gamers, and bookish crafters.
- A display-ready piece for desks, bookshelves, and craft corners—small enough to fit easily, detailed enough to draw attention.
- A project that rewards patience: the charm is in the small steps, tidy edges, and careful placement of each tiny element.
At-a-glance project fit
| Best for | Why it works | Tip for success |
|---|---|---|
| Beginner-to-intermediate crafters | Guided assembly with a puzzle-like structure | Do a quick parts sort before starting |
| Book lovers & fantasy fans | Magical books and study-room styling | Use warm lighting in your workspace to see small details |
| Mindful hobby time | Repetitive, calming steps with a clear payoff | Work in 20–40 minute sessions to stay fresh |
| Gift giving | Looks thoughtful and handmade when completed | Wrap with a note: “Built with care—one tiny book at a time” |
What to prepare before starting
A little setup time saves a lot of “where did that go?” later. Our team recommends planning for control and comfort: small parts, tiny paper layers, and precise alignment all go more smoothly when your station is ready.
- A clean, bright workspace: a tray or shallow box lid helps keep tiny pieces from wandering off.
- Basic tools most makers already have: precision scissors, tweezers, a small file/emery board, and a craft knife (optional for neat edges).
- Adhesive plan: pick one main glue and use a toothpick for small dots—less glue means cleaner results.
- Dry-fit first: test how parts align before committing with glue, especially around corners and layered details.
If you’re crafting in a smaller space or sharing a table, our Maximize Function, Minimize Clutter (Small Space Design Guide eBook) is a helpful companion for setting up a work zone that packs away fast without losing your rhythm.
A simple build flow that keeps the magic (and prevents mistakes)
This is one of those projects where “steady” beats “fast.” When you build in a predictable order, you protect your clean edges, reduce rework, and keep the fun part—watching the study scene come alive—front and center.
- Step 1: Sort and label. Group wood pieces, paper pieces, and any small accessories so assembly stays smooth.
- Step 2: Build the base and main structure first. A stable foundation makes the rest of the details easier to align.
- Step 3: Add shelves and “big shapes,” then layer in the books and decorative elements. Working from large to small reduces rework.
- Step 4: Keep surfaces clean as you go. Wipe stray glue immediately for a crisp finished look.
- Step 5: Final pass for alignment. Straighten shelves, square corners, and press layers flat before everything fully sets.
Two safety notes that make crafting more comfortable: work in a well-ventilated area when using adhesives (the EPA has practical guidance on indoor air quality at https://www.epa.gov/indoor-air-quality-iaq), and keep sharp tools and small parts handled responsibly—especially around kids and pets (see the CPSC’s art and craft safety tips: https://www.cpsc.gov/Safety-Education/Safety-Education-Centers/Art-and-Craft-Safety).
How to make the finished study look polished on display
The most charming miniatures don’t just sit on a shelf—they feel “placed.” Once your magic study is complete, a few small styling decisions help the details read clearly and stay looking fresh.
Make it a better hobby night: set up the space (and keep it that way)
If your bigger goal is a calmer home base for hobbies (not just one project), our team also recommends One Room, Real Progress: A Simple Step-by-Step Guide for Stress-Free Home Organization to help you set up a system you’ll actually keep using.
FAQ
Is this miniature kit beginner-friendly?
Yes—if you’re comfortable taking your time and using simple tools like tweezers and small scissors. Sort pieces first, dry-fit before gluing, and build in short sessions to keep the process smooth and enjoyable.
What tools and glue work best for a clean finish?
Tweezers, small scissors, and a file/emery board make a noticeable difference in clean placement and snug edges, with an optional craft knife for extra precision. Use one dependable glue and apply tiny amounts with a toothpick, wiping any excess right away.
How long does it usually take to complete a miniature study build?
Completion time depends on your pace and how detailed you like to be—some people finish in a focused afternoon, while others prefer spreading it across a few evenings. Slower, careful detailing generally creates the cleanest, most display-ready result.





Leave a comment